An every growing list of everyday tech problems, tips, tricks, and solutions
Author: Robert Hopkins
I enjoy the creative problem solving that comes with tech, as well as the added challenge of trying to translate instructions to others in a way they can understand and find helpful
An ad-block browser extension is one of the first things I install on a new computer and browser. As the name suggests, the main use of an ad-blocker is to block ads on websites and Youtube videos. But what you might not notice or know is that having an ad-block on your browser makes your internet experience safer for you.
One way many people get scammed online is because a popup tells them they have a virus, they call that number, and get scammed. But, if you have ad-block on your browser, you will never see those scam popups. Another, less scammy, but similarly disingenuous thing ad-block blocks are “sponsored results” on Google search and other pages. When you used to search google, all results below would be organic search results, but now, Google sells ad space in place of the first few results. With an ad-block browser extension these sponsored results will be blocked.
The ad-block extension I and many others use for Chrome and Firefox is u-block origin.
$200-$500 – This computer will allow you to browse the web, write documents, check email, and do other light online activities. You can do some light photo editing on it, but you will notice the lack of performance and will be limited by the small hard drive. This computer can last you as long as a more expensive computer, but after a 1-2 years, you will notice an overall slowdown.
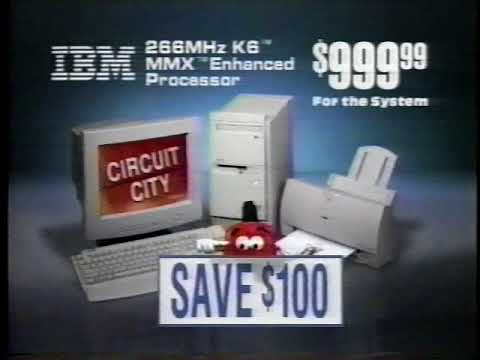
$500-$900 – This is a sweet spot between performance, affordability, and longevity. It can handle everyday things like online browsing, emails, and word docs, as well as more graphic intensive applications like editing photos without much of a drop in performance. This computer will most likely last you 3-5 years before you notice any type of slow down. And even then, you’ll notice a smaller drop in speed vs the cheaper computer above. This is also a price point where you might find more expensive computers on sale ($1000 computer on sale for $800).
$900+ – More money spent means more performance, more longevity, and more hard drive space. This computer should set you up to have a very fast computer for at least 5-6 years, if not longer (depending on what you buy and what you want to do with it), and then when it might start slowing down, it will be even less noticeable than the medium priced computers. This computer should be able to handle anything you throw at it (media editing, online use, graphic programs, etc).
Additional Info
Laptop vs Desktop – Generally, laptops are more expensive for similar performance as their desktop counterparts, but allow for mobility. Laptops can also be hooked up to a separate keyboard, mouse, and screen if you wanted to use it both as a desktop computer and laptop.
Sales – If you’re looking to purchase a new computer, and don’t need one immediately, keep an eye out for sales during holidays and nationwide events. The Superbowl, Black Friday, Thanksgiving, Christmas, July 4th, Labor Day are just some of the dates you will see computer deals.
Want to learn more about what to look for in a new Windows computer, or want help picking out a new one? Contact the Tutor today!
On both Apple and Android phones, you can take a photo by pressing either volume button along the side of your phone. This is like a physical button on an old camera.
For people who have trouble holding their phone steady or mistakenly take multiple photos at once, using the physical button instead of the touch screen can help you hold the phone steadier and only take one photo at a time.
To use this feature, open your camera like normal, then click either the up volume or down volume button and your camera will take a picture.
To learn more about how to use your Apple Trackpad on your laptop, you can view Apples built in guide located in your computers System Preferences menu.
Navigate to Trackpad menu
Click on the “System Preferences” icon
You can find the icon in your Dock1(bottom of your screen). If not, click the Launchpad2icon (also in the dock) to view all your application icons
Click on the “Trackpad” icon in the System Preferences menu3
Trackpad Guide
Here you will find different types of options for your Trackpad. Each option is shown along side a small “how to” video. To view the video example for each option all you need to do is move your cursor over the option (no clicking) and the video example will play (on repeat)
Definitions
Dock – The bar at the bottom of your screen that has application icons
Launchpad – A built in app that allows you to view all applications currently install on your computer. Usually located in your dock.
System Preferences Menu – This is all the settings and options for your computer and iCloud are located. To view a category, click on the icon you want to view. If you cannot find what you’re looking for, you can type use the search tool in the top right of the system preferences window and the computer will highlight options that should be what you’re looking for.
Click the trashcan icon at the bottom right corner of the screen
The photo is now deleted
Deleting multiple photos
Open photos app on iPhone
Find the photos you want to delete
Click the “Select” option in the top right corner of your screen
Then click on the all the photos you want to delete (a blue check mark will appear when selected)
When all photos you want deleted are selected, click the trash can icon at the bottom right corner of the screen
The photos are now deleted
Recover deleted photo(s)
Deleted photos will be saved in the “Recently Deleted” folder for 30 days, then they will be automatically deleted. They can be restored with these steps
Open photos app
Click on “Albums” at the bottom of the screen
Scroll all the way down to find the “Recently Deleted” option under “Utilities”
Click Recently Deleted
Click “Select” at the top right of the screen
Click on all photos you want restored
When all photos are selected, click “Recover” at the bottom right of the screen
This is helpful when trying to manage, organize, and delete multiple files, photos, emails etc at once on your computer. There are two ways to select multiple items, one allows you to quickly select all items in a list, the other allows you to pick and choose which items in the list you want selected. Both options can be done on a Mac or Windows computer.
To select ALL items between “point A and point Z”
Single click and release on the first item in the list
Then hold down the shift key on your keyboard
While holding down the shift key, single click and release on the last item in the list you want selected
All items between point A and Z should be highlighted and you can release the shift key
To select SOME items between “point A and point Z”
Single click and release on the first item in the list
For Mac – Then hold down the Command Key (⌘) on your keyboard
For Windows – Then hold down the Control Key on your keyboard
While holding down the command (or control) key, single click and release on all items between point A and point Z you want selected
If you select an item by accident, click on it again (while holding the command key) to deselect it
Once all items are selected you can release the command key
All items you clicked on between point A and Z should be highlighted
Long Answer: On older computers, you used to need to download a third party1 anti-virus software. On modern computers, the pre-installed programs are very capable and can replace paid and free third party software of the past.
On a Windows computer, the default Microsoft anti-virus program that comes pre-installed on your computer is very good and free. It will keep itself up to date and run automatic scans without you having to do anything. You can also run a scan manually.
On an Apple computer you generally don’t need any anti-virus software as most virus are written for Windows computers (the largest user base worldwide) and are .exe files, which cannot be opened on a Mac.
The only other program you might want to download both on Windows and Apple when it comes to computer security is Malwarebytes, which offers free and paid options.
Malwarebytes is is an anti-malware software for Microsoft Windows,[4]macOS, Chrome OS, Android, and iOS that finds and removes malware.[5] Made by Malwarebytes Corporation, it was first released in January 2006. It is available in a free version, which scans for and removes malware when started manually, and a paid version, which additionally provides scheduled scans, real-time protection and a flash-memory scanner.
Third-party software is a computer program created or developed by a different company than the one that developed the computer’s operating system. For example, any software running on a Microsoft computer that was not created by Microsoft is third-party software.

 in the System Preferences menu3
 – A built in app that allows you to view all applications currently install on your computer. Usually located in your dock.